From Canvas to Clicks: The Art of Photographing Antique Paintings for Sale
Why Photography Defines the Value of Antique Art Online
In the world of fine art and antiques, first impressions are everything. When potential buyers browse online galleries, auction houses, or boutique marketplaces, your photographs serve as your sales ambassadors. A single image can evoke emotion, communicate craftsmanship, and instantly convey the value of a centuries-old masterpiece.
Yet, photographing antique paintings requires more than just a camera and good lighting, it demands respect for history, technical precision, and an artist’s eye. Understanding how to photograph antique paintings correctly can dramatically increase engagement, trust, and final sale prices. This guide reveals professional strategies, tools, and creative techniques to help antique art sellers capture truly stunning online listings that do justice to their pieces.
Understanding the Essence of Antique Art Photography
Antique paintings are not ordinary subjects. They embody time, texture, and tradition. Photographing them is an act of preservation and storytelling, one that balances accuracy with aesthetics. Unlike modern artworks with clean lines and uniform surfaces, antique paintings often feature cracked varnish, aged pigments, or delicate gilded frames. These characteristics must be showcased authentically, without distortion or glare.
The goal isn’t to “beautify” but to translate the physical experience of viewing the artwork into a digital medium. A collector or curator should feel they can almost touch the brushwork through your photograph. This subtlety separates amateur snapshots from museum-quality listings.
Choosing the Right Equipment: Precision Over Price
High-quality results begin with the right tools. While a smartphone can suffice for casual product shots, antique paintings demand the clarity and control of a dedicated camera setup.
a. Camera and Lens
A DSLR or mirrorless camera with manual settings offers the flexibility needed to control exposure, white balance, and focus. Choose a full-frame sensor for maximum dynamic range, especially useful when capturing rich tonal variations in old oil paintings.
Lens: A 50mm or 85mm prime lens provides minimal distortion and crisp detail. Avoid wide-angle lenses, they can warp the frame edges.
Tripod: Essential for maintaining alignment and stability. Even the slightest camera shake can blur fine details.
Remote Shutter or Timer: Prevents vibration when pressing the shutter button, ensuring absolute sharpness.
b. Lighting Equipment
Lighting defines texture and color fidelity. Invest in two diffused continuous lights or softboxes positioned at 45-degree angles on either side of the painting. This eliminates harsh reflections and provides even illumination across the surface.
For glossy varnishes or framed works behind glass, polarizing filters on both your camera lens and lights can help suppress unwanted glare without dulling the image.
Preparing the Painting: Gentle Handling and Setup
Before taking a single photograph, ensure the painting is clean, secure, and well-positioned. Mishandling can cause irreversible damage, something no sale is worth risking.
a. Inspection and Dust Removal
Use a soft, natural-bristle brush to gently remove surface dust. Never apply moisture or cleaning agents unless approved by a conservation expert. Remember, even the lightest pressure on old paint layers can cause flaking.
b. Positioning the Artwork
Place the painting vertically on a sturdy easel or flat wall. Ensure it’s level; even a minor tilt can distort perspective in photographs. If shooting framed pieces, ensure the frame’s edges are parallel to the viewfinder’s borders for perfect alignment.
c. Background and Space
Opt for a neutral backdrop, mid-gray, ivory, or matte black. A clean background enhances focus on the artwork and reduces color contamination. Keep the shooting space uncluttered to avoid distracting reflections.
Mastering the Lighting: Bringing Out True Depth and Color
Lighting antique paintings is both art and science. The challenge lies in balancing illumination to reveal texture without flattening or overexposing the surface.
a. The 45/45 Setup
This classic arrangement involves placing two diffused lights at 45-degree angles from the artwork and 45 degrees above its surface. This method evenly illuminates the painting while minimizing reflections and shadows.
b. Natural Light Considerations
If you prefer daylight, shoot during overcast conditions near a north-facing window to achieve soft, consistent illumination. Avoid direct sunlight, it can cause hotspots, glare, and uneven exposure.
c. Polarization Technique
For glossy varnishes, use a circular polarizing filter on your lens and polarized film on your lights. Rotate the filter until reflections vanish, revealing true pigment depth and surface texture. This technique is invaluable for paintings with heavy varnish or metallic leafing.
Camera Settings: Precision in Every Pixel
Once your setup is perfect, fine-tune your camera settings to capture the artwork in its truest form.
ISO: Keep ISO low (100–200) to minimize digital noise.
Aperture: f/8 to f/11 provides optimal sharpness and depth.
Shutter Speed: Adjust based on lighting; use a tripod to handle slower speeds without blur.
White Balance: Use a gray card to calibrate color accuracy. Antique paintings often have aged varnish tones that can shift under artificial light, accurate white balance prevents misrepresentation.
RAW Format: Always shoot in RAW for maximum editing flexibility and tonal range.
Perfecting Composition and Framing
Composition is your silent storyteller. A perfectly aligned image conveys professionalism and respect for the art.
a. Align With Geometry
Ensure all edges of the painting are parallel within the frame. Use your camera’s grid overlay to check alignment. A slightly skewed perspective can subconsciously suggest carelessness to discerning buyers.
b. Include Context
While the main image should show the painting straight-on, include additional photos showing the frame details, signature, texture, and rear panel if possible. These contextual shots build trust and provide collectors with authenticity cues.
c. Minimalist Presentation
Avoid decorative props or backgrounds unless relevant (for instance, a velvet-covered stand for a small gilded portrait). Simplicity directs focus where it belongs, on the art.
Post-Processing: Enhancing Without Altering
Editing should enhance accuracy, not artistic interpretation. Over-editing risks misrepresenting the painting’s true color or condition, which can damage your credibility and buyer confidence.
a. Color Correction
Use software like Adobe Lightroom or Capture One to fine-tune white balance and exposure. Compare the digital image with the painting under neutral light to ensure fidelity.
b. Perspective Adjustment
Correct any lens distortion or misalignment so the painting appears perfectly rectangular. Tools like the “Transform” function in Lightroom make this easy.
c. Retouching Ethics
Remove only temporary or irrelevant imperfections such as dust spots or background lint. Never alter cracks, patina, or brushwork, these are part of the painting’s history and authenticity.
d. Export Settings
Save images in high-resolution JPEG or TIFF formats (300 DPI minimum). Create web-optimized versions (around 2000 pixels on the longest side) for faster loading on online galleries.
Capturing Detail Shots That Tell a Story
Serious art collectors and curators value transparency. Detail shots demonstrate authenticity and craftsmanship. Include macro close-ups that highlight:
The brush texture and paint layers.
The signature or date, if visible.
The frame’s corner joinery or gilding.
Any hallmarks, gallery labels, or restoration evidence on the back.
These details not only build confidence but also enrich your listing’s storytelling, allowing buyers to appreciate the painting as more than just an image, but as a piece of history.
Building a Cohesive Online Presentation
Consistency across your listings reinforces brand identity and professionalism. Consider the aesthetic tone of your portfolio or online store.
Use uniform lighting and background colors for all paintings.
Maintain consistent aspect ratios so your catalog feels curated.
Include both full and detail shots in a clear order, overall view, signature, texture, back panel, and frame.
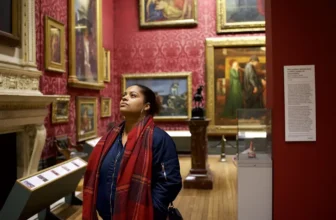
High-end buyers often browse multiple listings before purchasing. A cohesive photographic style signals trust and expertise, increasing the likelihood of inquiry or sale.
Avoiding Common Mistakes When Photographing Antique Paintings
Even experienced sellers sometimes make avoidable errors that compromise the visual integrity of their listings.
Glare and reflections from varnish or glass can hide key details, always check your lighting angles.
Distorted perspective from shooting off-center gives a warped appearance.
Overexposure washes out color richness and surface texture.
Color shifts from mixed lighting (daylight + tungsten) can misrepresent authenticity.
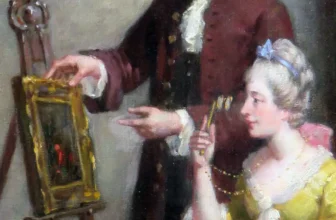
Ignoring the frame, for antique collectors, the frame’s age and style can be as valuable as the painting itself.
By avoiding these pitfalls, your listings will not only look professional but also command higher trust and valuation.
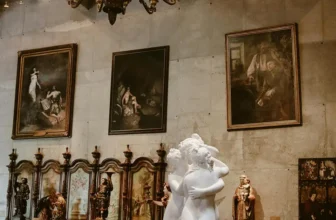
Adding a Luxury Touch: Photographing for Prestige Platforms
If your target market includes high-end collectors or galleries, elevate your photography to reflect sophistication and exclusivity.
a. Use Fine Art Presentation Style
Shoot against soft neutral fabrics, such as linen or suede, for small works. Use shallow depth of field (f/4–f/5.6) for atmospheric lifestyle shots that evoke a gallery ambiance.
b. Create Ambient Lighting Shots
Capture one or two images showing the painting in situ, on a muted wall or within a tastefully designed interior. This helps potential buyers visualize scale and elegance without compromising authenticity.
c. Include Certificate or Provenance Shots
If provenance or certificates accompany the painting, include them in secondary images. Presentation of documentation reinforces credibility and luxury branding.
Optimizing Images for Online Platforms
Each platform, from eBay to 1stDibs to your own boutique site, has different requirements. Optimize accordingly.
File Naming: Include keywords like “antique oil painting portrait 19th century – photographer name” for SEO value.
Alt Text: Use descriptive, keyword-rich alt tags such as “how to photograph antique paintings – detailed texture of 18th-century landscape.”
Thumbnail Cropping: Ensure the focal area (the subject’s face or central motif) remains visible in preview thumbnails.
Image Compression: Use lossless compression to maintain clarity while improving load speed, critical for luxury buyers who expect seamless browsing.
Building Trust Through Transparency
High-value art buyers seek confidence as much as beauty. Include photographs that show authenticity, back panels, labels, restoration notes, and imperfections. When you present these openly and beautifully, you create a bond of honesty that turns curiosity into commitment.
Capturing Time with Light
Learning how to photograph antique paintings is more than a technical pursuit, it’s a dialogue between light and history. Each painting carries the touch of an artist long gone; your role is to preserve that presence through your lens.
When you photograph with respect, precision, and artistry, your listings don’t just attract attention, they command admiration. Whether you’re showcasing an 18th-century portrait or a Renaissance landscape, the care you take in presentation reflects directly on the perceived value of your collection.
In the digital age of art commerce, where screens replace showrooms, mastering the craft of photographing antique paintings bridges the gap between craftsmanship and commerce. Your camera becomes the conservator of legacy, and your photograph, the first step toward a new chapter in the artwork’s journey.